


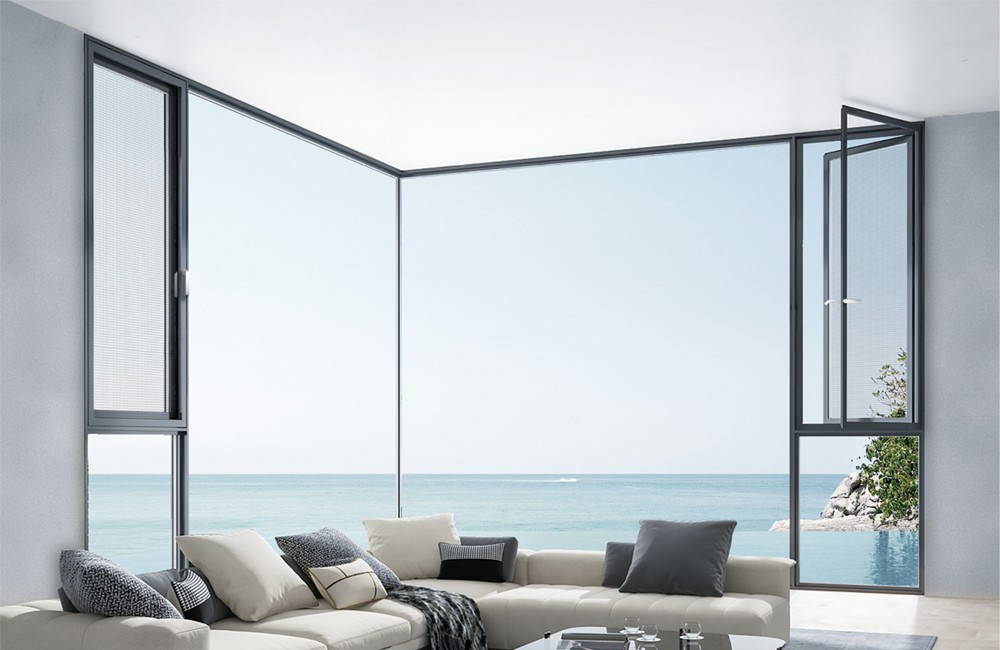

Embarking on a home remodel is an exhilarating journey. You're not just changing walls and floors; you're reshaping your living space, enhancing your lifestyle, and creating a sanctuary that truly reflects you. One of the most impactful changes you can make is installing a new sliding door. It can flood a room with natural light, create a seamless transition to the outdoors, and elevate your home's entire aesthetic. But with this excitement comes a common point of anxiety: getting the measurements right. An incorrect measurement can turn a dream project into a frustrating and costly ordeal. This guide is here to eliminate that fear. We'll walk you through every step, ensuring you have the confidence and knowledge to measure for your new sliding door like a pro.
Part 1: Why Millimeters Matter: The Critical Importance of Accuracy
You might be tempted to think, "a little off here or there won't matter." When it comes to system doors, especially high-performance ones, that couldn't be further from the truth. Precision is not just a preference; it's a prerequisite for performance, longevity, and beauty. Let's break down why every single millimeter counts.
The Tangible Costs of Inaccuracy
Mistakes in measurement have real-world consequences that can hit your wallet and your timeline hard.
- Financial Setbacks: A custom-made sliding door that doesn't fit is often non-returnable. You might face the full cost of re-ordering a new unit. Even if the door can be modified, it involves extra labor costs for your contractor to cut back drywall, re-frame the opening, or use excessive amounts of shims and fillers, which can compromise the final result.
- Project Delays: A wrongly sized door brings your project to a screeching halt. The time spent waiting for a replacement unit can be weeks, or even months, leaving a gaping hole in your home and throwing your entire renovation schedule into disarray.
- Performance Compromises: This is the most critical and often overlooked cost. A poorly fitting door will never perform as it was designed to. You'll experience drafts, water leaks during rainstorms, and reduced energy efficiency, leading to higher utility bills. The door might be difficult to slide, feel wobbly, or fail to lock securely, compromising your home's safety.
The Lasting Benefits of Precision
Conversely, when you provide perfectly accurate measurements, you unlock the full value of your investment.
- Seamless Installation: Your contractor will thank you. A door that is sized correctly for its opening fits into place smoothly and efficiently. The installation is quicker, cleaner, and more robust.
- Optimal Performance: A precisely fitted door creates a perfect seal. This means superior thermal insulation, keeping your home warm in the winter and cool in the summer. It ensures maximum soundproofing, giving you a quieter, more peaceful indoor environment. The sliding mechanism will operate effortlessly, gliding smoothly for years to come.
- Aesthetic Perfection: There will be no unsightly large gaps that need to be filled with excessive caulk or trim. The door will look like it was always meant to be there, with clean lines and a flawless finish that enhances your home's architectural integrity.
When you invest in a high-quality product, like a custom door built from premium aluminum , you're choosing a system engineered for excellence. Providing accurate measurements is how you ensure that engineered excellence is fully realized in your home.
Part 2: Gearing Up: Essential Tools and Terminology
Before you extend that tape measure, let's get prepared. Having the right tools and understanding the key terms will make the process infinitely smoother and more accurate. Think of this as your pre-flight checklist.
Your Measurement Toolkit
You don't need a professional's entire toolbox, but a few quality items are non-negotiable:
- High-Quality Steel Tape Measure: This is your most important tool. Use a sturdy, retractable steel tape measure that is at least 25 feet (or 8 meters) long. Avoid cloth tapes or flimsy, old measures that can stretch or bend, leading to inaccuracies.
- A Carpenter's Level: A 24-inch level is good, but a 48-inch level is even better as it spans more of the opening. This is essential for checking if your opening is level (horizontal) and plumb (vertical).
- Pencil and Notepad (or a Digital App): Don't rely on memory. Write down every single measurement immediately. A dedicated notepad or a notes app on your phone is perfect. Precision is key, so write down the exact numbers, like "71 5/8 inches," not "about 72 inches."
- Step Ladder: For taller openings, a sturdy step ladder will ensure you can safely and accurately measure the top portions.
- A Helper: While you can do it alone, having a second person to hold the other end of the tape measure, especially for diagonal measurements, significantly improves accuracy and ease.
Decoding the Lingo: Speak Like a Pro
When you talk to a manufacturer like ALPES, using the right terminology ensures everyone is on the same page. Here are the key terms you need to know:
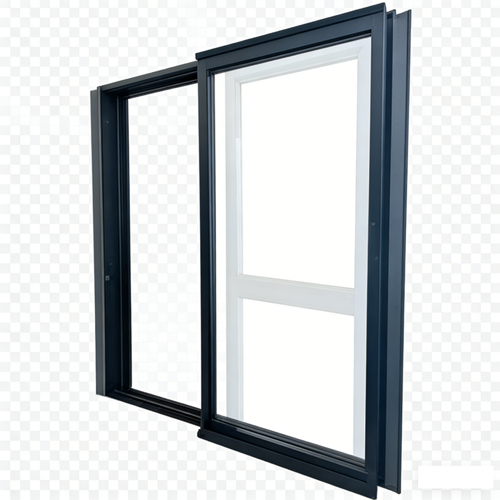
Rough Opening (RO): This is the most crucial term. The rough opening is the structural frame in the wall where the door will be installed, measured from stud to stud (width) and from header to subfloor (height). The door unit itself will be slightly smaller than the rough opening to allow for adjustment.
Jambs: These are the vertical components of the door frame. There's a side jamb on each side and a head jamb at the top.
Sill (or Threshold): This is the bottom component of the door frame that you step over. It's a critical piece for weather sealing.
Header: This is the structural beam at the top of the rough opening that supports the weight of the wall above.
Net Frame Size: This refers to the exact exterior dimensions of the complete door unit as it comes from the factory. You will typically measure the opening, and the manufacturer will calculate the required net frame size.
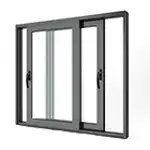
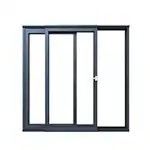
Handing (or Operation): This describes which direction the door slides. It's usually designated from an exterior view. "XO" means the left panel is fixed (O) and the right panel slides (X). "OX" means the opposite. For a four-panel door, "OXXO" means the two center panels slide open toward the fixed outer panels.
Part 3: The Definitive Step-by-Step Measurement Guide
This is where the action happens. We'll cover the two most common scenarios: replacing an existing door and measuring for a brand-new installation. Follow these steps methodically, and don't rush.
Scenario 1: Measuring for a Replacement Door (in an Existing Frame)
This process is for when you are simply swapping out an old sliding door with a new one of the same size, without altering the wall. You will be measuring the inside of the existing door frame.
-
Measure the Width:
You'll take three horizontal measurements from the inside of the side jamb on the left to the inside of the side jamb on the right.
- Measure across the top of the opening.
- Measure across the middle of the opening.
- Measure across the bottom of the opening.
Record the SMALLEST of these three measurements. This is your final width. Why the smallest? Because the new door must be able to fit through the narrowest point of the opening.
-
Measure the Height:
Now, you'll take three vertical measurements from the bottom of the head jamb down to the top surface of the sill (the part you step over).
- Measure the height on the left side.
- Measure the height in the middle .
- Measure the height on the right side.
Record the SMALLEST of these three measurements. This is your final height. Again, this ensures the door will fit at the shortest point of the opening.
When you provide these measurements to a supplier, be sure to specify that they are "inside frame" or "daylight opening" measurements. They will use this information to manufacture a door that fits perfectly within your existing frame.
Scenario 2: Measuring for a New Installation (The Rough Opening)
This is for new construction or a major remodel where the wall is open and you can see the wooden studs. This is the most accurate way to measure as you are measuring the structural space the door will occupy.
-
Measure the Rough Opening (RO) Width:
Measure horizontally from the inside face of the vertical stud on one side to the inside face of the vertical stud on the other.
- Measure across the top of the opening, just below the header.
- Measure across the middle .
- Measure across the bottom , near the floor.
Record the SMALLEST of these three measurements. This is your Rough Opening Width.
-
Measure the Rough Opening (RO) Height:
Measure vertically from the underside of the header (the main horizontal beam at the top) down to the surface of the subfloor (the bare wood or concrete floor that your finished flooring will sit on).
- Measure the height on the left side.
- Measure the height in the middle .
- Measure the height on the right side.
Record the SMALLEST of these three measurements. This is your Rough Opening Height. It's crucial to measure to the subfloor, not any existing finished flooring that might be removed.
The door's net frame size will be slightly smaller than these rough opening dimensions to allow space for shimming, leveling, and insulating around the frame. A professional manufacturer like ALPES knows the precise deductions needed for their specific systems based on your rough opening measurements.
Step 3: The Holy Trinity of Checks: Square, Level, and Plumb
A door is a rectangle, and it functions best in a perfectly rectangular hole. These checks are just as important as the height and width measurements.
-
Check for Square:
Use your tape measure to check the opening diagonally. Measure from the top-left corner to the bottom-right corner. Write it down. Now, measure from the top-right corner to the bottom-left corner. In a perfectly square opening, these two measurements will be identical. If there's a difference of more than 1/4 inch, make a note of it. This indicates the opening is out of square, which will be important information for the installer.
-
Check for Level:
Place your carpenter's level on the sill (or subfloor at the bottom of the opening). Check the bubble. Is it perfectly centered? If not, the opening is not level. An unlevel sill is a primary cause of a sliding door that sticks or doesn't seal properly. Do the same for the header at the top.
-
Check for Plumb:
Hold your level vertically against the side jambs (or studs). Check the bubble to see if they are perfectly vertical. An opening with out-of-plumb sides will cause the door to bind against the frame and wear out the rollers prematurely.
Note down any and all imperfections. A good installer can correct for minor issues, but knowing about them beforehand is crucial.
Step 4: Document Everything with Clarity
Now, let's bring it all together. Use a simple chart to keep your measurements organized and clear. You can copy this format into your notebook or a digital document.
| Sliding Door Measurement Worksheet | |
|---|---|
| Width (Top) | [Record smallest width here] |
| Width (Middle) | [Record middle width] |
| Width (Bottom) | [Record bottom width] |
| Final Width to Use | [Smallest of the three above] |
| Height (Left) | [Record left height here] |
| Height (Middle) | [Record middle height] |
| Height (Right) | [Record right height] |
| Final Height to Use | [Smallest of the three above] |
| Diagonal (Top-Left to Bottom-Right) | [Record diagonal 1] |
| Diagonal (Top-Right to Bottom-Left) | [Record diagonal 2] |
| Notes (Plumb, Level, etc.) | [e.g., Sill is 1/8" out of level, left jamb is not plumb, wall material is brick] |
Part 4: Common Pitfalls and How to Sidestep Them
Even with the best intentions, mistakes can happen. Here are some of the most common errors people make during the measurement process. Being aware of them is half the battle.
- Measuring Only Once: Always measure everything at least twice. The "measure twice, cut once" mantra applies perfectly here. The triple-measurement technique (top, middle, bottom) is designed to catch variations in the opening.
- Ignoring the Level and Square Checks: Don't skip the diagonal, level, and plumb checks. A door's width and height might be correct, but if it's being installed into a parallelogram instead of a rectangle, you will have major operational issues.
- Measuring the Old Door Panel: Never measure the door panel itself. Always measure the opening the door fits into (either the frame or the rough opening). Old doors may have sagged or been trimmed to fit an imperfect opening.
- Rounding Numbers: Be exact. Record your measurements to the nearest 1/16th of an inch (or to the millimeter). Don't round up or down to "make it easier." That small fraction of an inch can be the difference between a perfect fit and a problem.
- Forgetting About Flooring: When measuring a rough opening, remember to measure to the subfloor. If you plan on installing thick tile or hardwood, inform your door supplier. The height of the door's sill may need to be adjusted to accommodate the new finished floor height.
Part 5: Beyond the Numbers: Considering Style, Function, and Material
Your measurements provide the "what," but you also need to define the "how" and "why." A new door is a significant design element, and the right choices will ensure it meets all your functional and aesthetic goals.
Configuration and Flow
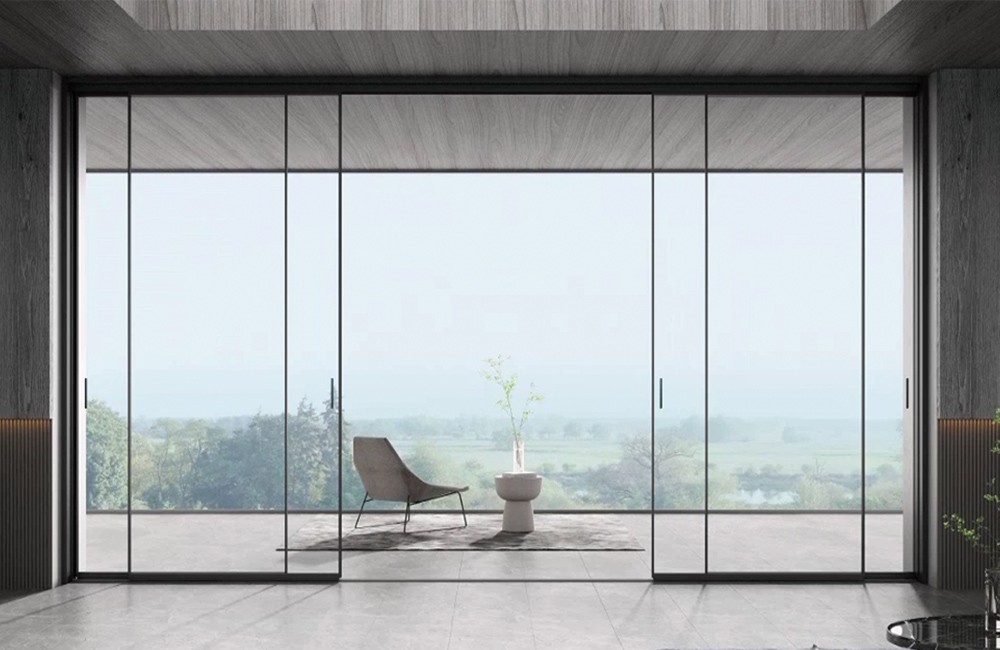
Think about how you use the space. A standard two-panel sliding door is classic and efficient. For larger openings, you might consider a three or four-panel configuration to maximize your view and opening space. The handing (e.g., XO vs. OX) is also crucial. Consider the flow of traffic from inside to outside. Which side makes more sense to have as the opening? Is it leading onto a patio with furniture on one side? Planning this now prevents daily inconvenience later.
The Power of Premium Material
The material of your door frame is foundational to its performance and appearance. This is where premium aluminum truly shines. Aluminum frames, like those expertly crafted by ALPES, offer a unique combination of benefits perfect for modern sliding doors:
- Strength and Slim Profiles: Aluminum's inherent strength allows for very slim, yet robust, frames. This maximizes the glass area, giving you more light, more view, and a sleek, contemporary look that other materials can't match.
- Durability and Low Maintenance: Unlike wood, aluminum does not rot, warp, or swell in response to humidity. It's naturally resistant to corrosion and pests. ALPES's advanced powder-coating finishes provide a durable, beautiful color that won't need to be repainted, standing up to harsh weather for decades.
- Thermal Performance: Modern aluminum doors from top manufacturers utilize sophisticated thermal break technology. This involves a reinforced polyamide strip that separates the interior and exterior aluminum profiles, effectively stopping heat transfer. This makes ALPES doors highly energy-efficient.
The precision manufacturing that takes place in ALPES's 100,000 square meter production bases ensures that every component is made to exacting tolerances, ready to fit the precise measurements you so carefully took.
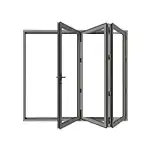
Considering Your Options: Sliding vs. Folding Door
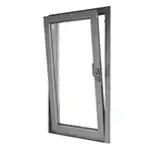
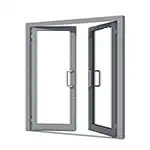
For very large openings, it's worth understanding your options. While a multi-panel sliding door is a fantastic choice, a Folding Door (also known as a bifold door) offers a different experience. A sliding door works by having one or more panels slide parallel to a fixed panel. A folding door features multiple panels hinged together that fold and stack neatly to one or both sides. The key difference is that a folding door can open up nearly the entire width of the opening, creating a truly dramatic and unobstructed connection to the outdoors. The choice depends on your space and goals. Sliding doors are often more space-efficient when open, as they don't protrude into the living or patio area, while folding doors provide the ultimate wide-open feel.
The ALPES Advantage: From Your Measurement to a Masterpiece
You've done the hard work of measuring, and now you need a partner who can turn those numbers into a reality that exceeds your expectations. This is where choosing a specialist manufacturer makes all the difference.
As one of China's top manufacturers of aluminum windows & doors , ALPES doesn't just sell products; we provide comprehensive solutions. Our team understands that your measurements are the starting point of a collaborative process. We work with you or your contractor to review the details, discuss the specifics of your project—from handing to hardware—and ensure the final product is perfectly tailored to your opening and your vision.
Our extensive global experience, with successful projects in demanding climates from the heat of Dubai to the specific building standards of Australia, means we have a deep understanding of what it takes to create a door that performs. Our systems are not just beautiful; they are engineered to provide superior insulation, weather resistance, and security, no matter where you live.
By offering a factory-direct model, ALPES combines this world-class quality with exceptional value, ensuring you get a premium, custom-built system without the inflated costs of intermediaries. Your precise measurements, combined with our precision engineering, result in a door that is a true masterpiece of form and function.
Conclusion: The First Step to Transformation
Measuring for a new sliding door doesn't have to be intimidating. By following this guide, you've empowered yourself with the knowledge to do it correctly and confidently. Remember the key principles: prepare with the right tools, measure methodically in threes, always use the smallest dimension, and never skip the crucial checks for square, level, and plumb. Document everything clearly.
This careful first step is the foundation upon which your entire project is built. It's the key that unlocks a smooth installation, flawless operation, and years of enjoyment. You're now ready to take your measurements and move forward with the exciting part: choosing the perfect, high-performance ALPES sliding door that will transform your home, connect you with the outdoors, and fill your space with light and life for years to come.