


Unlock the full potential of your premium windows with our comprehensive guide, drawing from the expertise of a leading fenestration manufacturer.
The Unrivaled Appeal of Tilt and Turn Windows
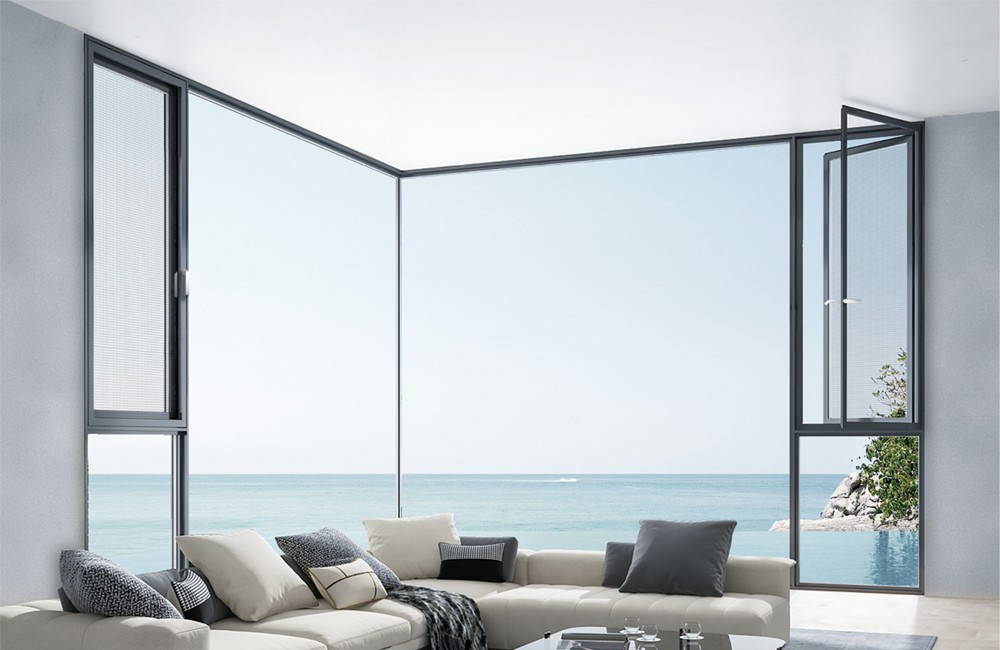
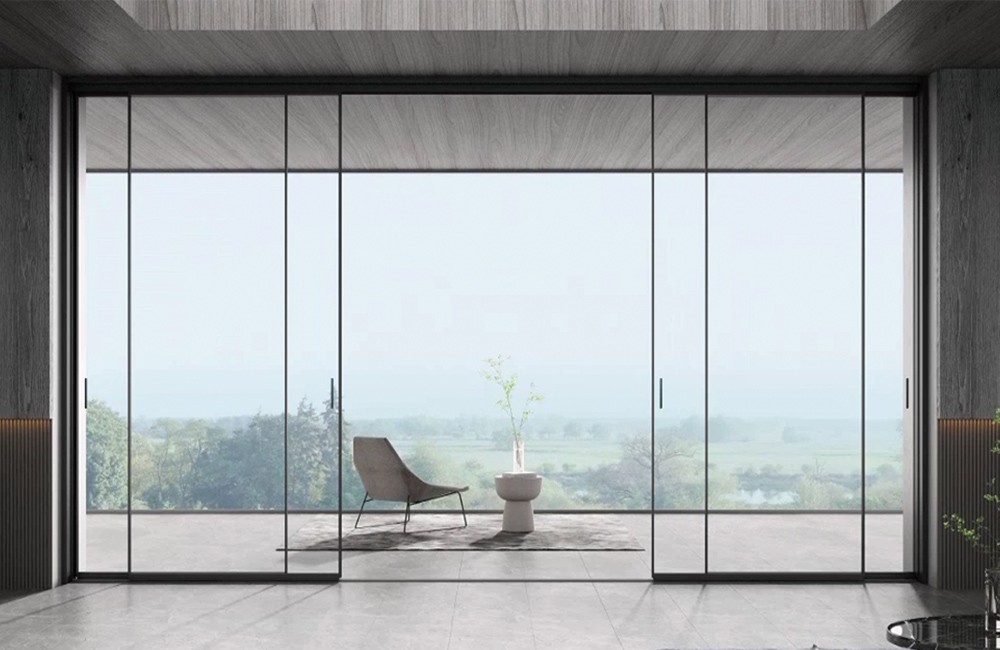
In the world of modern architecture and home renovation, few components offer as much elegance, functionality, and security as the tilt and turn window . This European-designed marvel has become a global favorite for good reason. It's not just a window; it's an intelligent solution for light, ventilation, and safety. But like any high-performance product, its ultimate value is only realized through correct and professional installation.
This guide is designed to walk you through that crucial process. We're not just giving you a list of steps; we're sharing the philosophy and best practices honed over years of manufacturing and global distribution. At ALPES, we've dedicated ourselves to becoming one of the most respected names in the industry, recognized as among the China Top 10 Aluminum Windows & Doors manufacturers. Our experience, from our state-of-the-art production centers in Foshan and Zhaoqing to high-end projects in Dubai and Australia, has taught us that a perfect window requires a perfect installation. Let's dive into how you can achieve that.
Chapter 1: Understanding the ALPES Advantage in Tilt and Turn Design
Before you even pick up a tool, it's vital to understand what makes a premium tilt and turn window special. It's more than just a pane of glass in a frame; it's a sophisticated system of engineered components working in harmony.
The Dual-Functionality Masterpiece
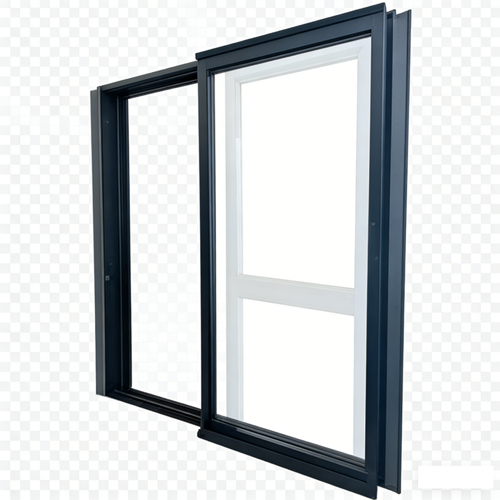
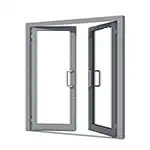
- Tilt Function: A simple turn of the handle allows the top of the sash to tilt inwards, creating a gap for secure, draft-free ventilation. This is perfect for letting in fresh air without compromising security or worrying about sudden rain showers.
- Turn Function: A further turn of the handle allows the entire sash to swing inwards like a door. This provides maximum ventilation, an emergency egress route, and, most conveniently, makes cleaning the exterior glass an effortless and safe task from inside your home.
At ALPES, we elevate this functionality by using premium-grade aluminum profiles with advanced thermal breaks. This means our windows don't just look good and operate smoothly; they provide exceptional insulation, keeping your home comfortable year-round and reducing energy bills. This commitment to performance is why our custom aluminum windows are sought after for demanding climates, from the scorching heat of Saudi Arabian villas to the varied weather of Australian coastal homes.
Engineered for Security and Durability
A key feature of a quality tilt and turn window is its multi-point locking system. Instead of a single latch, our windows engage multiple locking points around the entire perimeter of the sash when closed. This creates an incredibly secure seal that is highly resistant to forced entry. The robust hardware and reinforced frames we use ensure that this security doesn't come at the expense of longevity. Every component is designed to withstand tens of thousands of cycles, guaranteeing smooth operation for decades.
Chapter 2: The Pre-Installation Blueprint: Setting Yourself Up for Success
The old saying, "measure twice, cut once," is doubly true for window installation. A successful outcome is 90% preparation. Rushing this stage is the most common cause of installation headaches.
Step 1: Unboxing and Verification
Carefully unbox your new tilt and turn window. Lay it on a clean, protected surface. This isn't just about checking for shipping damage; it's about confirming the order.
- Check the Dimensions: Measure the height and width of the window frame and compare it to your order specifications and the rough opening.
- Inspect the Finish: Check the powder coating or anodized finish for any imperfections. Our quality control is rigorous, but a final on-site check is always wise.
- Test the Hardware: Before installation, gently operate the handle to check the tilt and turn mechanism. It should feel smooth and positive.
- Verify the Glass: Confirm you have the correct glass package (e.g., double or triple glazed, low-E coating, laminated).
Step 2: Preparing the Rough Opening
The window frame can only be as square and true as the opening it sits in. The rough opening must be perfect.
- Plumb, Level, and Square: Use a long level to check that the sides (jambs) are perfectly plumb (vertical) and the bottom (sill) and top (header) are perfectly level (horizontal).
- Check for Square: Measure the opening diagonally from corner to corner. The two measurements should be identical. A difference of more than 1/4 inch (6mm) indicates the opening is out of square and needs correction.
- Clean and Clear: The opening must be free of debris, old sealant, nails, or anything that could prevent the window frame from sitting flat.
- Weather Barrier: Ensure the building's weather-resistant barrier (WRB) is properly installed around the opening, ready to be integrated with the window flashing.
Step 3: Gathering Your Tools and Materials
Having everything on hand prevents delays and compromises. Here's a professional's toolkit:
- High-quality 4-foot and 2-foot levels
- Tape measure
- Power drill with appropriate bits
- Caulking gun
- Hammer and pry bar
- Composite shims (avoid wood which can rot or compress)
- Low-expansion spray foam insulation for windows and doors
- High-quality exterior-grade silicone sealant
- Window and door flashing tape
- Safety glasses and gloves
A Note on Teamwork: Aluminum and glass windows, especially larger units, are heavy. Installation is almost always a two-person job for both safety and precision. Don't try to be a hero; an extra pair of hands is your most valuable tool.
Chapter 3: The Step-by-Step Installation Process
With preparation complete, we move to the main event. Follow these steps methodically. Precision is more important than speed. Our manufacturing, rooted in the heart of China's aluminum industry, produces Foshan aluminum windows known for their tight tolerances. A precise installation honors that quality.
Step 1: Dry-Fit the Window Frame
Before any sealant or fasteners are used, it's wise to "dry-fit" the frame. For easier handling, you can often remove the sash from the frame. To do this, open the window to the "turn" position, and disengage the top hinge pin. With a helper, you can then lift the sash off the bottom hinge. Now, place the lighter frame into the rough opening. This allows you to see exactly how much shimming will be needed and identify any potential issues.
Step 2: Apply Sealant and Place the Frame
Remove the frame. Apply a continuous bead of high-quality silicone sealant along the inside edge of the exterior stop or blind stop of the rough opening, where the window's nailing fin or exterior face will make contact. This is your primary weather seal. With your helper, carefully lift the window frame back into the opening, pressing it firmly into the sealant.
Step 3: Shimming for Perfection
This is the most critical step. Shims are small wedges that create a precise gap around the window, allowing you to get it perfectly plumb, level, and square before fastening.
- Start by placing shims under the sill to level the frame. Use your long level. Place shim packs at both ends and at 1-2 points in the middle for larger windows.
- Move to the side jambs. insert shims near the top, bottom, and middle, and at every planned anchor/screw location.
- Use your level constantly on the inside of the frame. Adjust the shims until the frame is perfectly plumb and level. Check the diagonal measurements again to ensure it's square. The frame should be snug, but not bowed or twisted by the shims.
Step 4: Anchoring the Frame
Once the frame is perfectly shimmed, it's time to secure it. Drill pilot holes through the frame and shims into the rough opening's studs. Fasten the window using the appropriate screws for your wall type. Start by loosely fastening one top corner, then re-check for plumb and level before proceeding. Don't overtighten the screws, as this can distort the frame. The screws should hold the frame securely in the position set by the shims.
Step 5: Re-install the Sash and Test Operation
Carefully re-hang the sash onto the frame hinges. Close the window and operate the handle through its full range of motion—closed, tilt, and turn. It should operate smoothly without scraping or binding. If it doesn't, the frame may have been pulled out of square during fastening. This is the time to correct it before moving on.
Step 6: Insulating and Air Sealing
The gap between the window frame and the rough opening is a major source of energy loss if not sealed properly.
- Interior Seal: From the inside, apply low-expansion spray foam into the gap. Work carefully and don't overfill, as the foam will expand. This foam acts as both an insulator and an air barrier.
- Exterior Seal: Properly integrate the window with the building's weather-resistant barrier using self-adhering flashing tape. Follow the manufacturer's sequence (sill first, then jambs, then header) to create a shingled, waterproof effect. Finally, apply a bead of high-quality silicone sealant between the window frame and the exterior siding/cladding for a final, durable weather seal.
Chapter 4: Fine-Tuning and Adjustments for Flawless Performance
One of the hallmarks of a high-quality tilt and turn window , like those from ALPES, is the adjustability of the hardware. After installation, you can make micro-adjustments to ensure perfect alignment and compression for the ultimate in smooth operation and weather sealing.
The Power of Adjustability
Over time, a house can settle, or seasonal temperature changes can cause minor shifts. The ability to adjust your windows is crucial for long-term performance. Most adjustments are made with a simple Allen key. Look for adjustment screws on the hinges and locking points (cams).
| Problem | Possible Cause | Adjustment Solution |
|---|---|---|
| Sash scrapes the frame at the bottom when closing. | Sash has sagged slightly over time. | Use the height adjustment screw on the bottom corner hinge. Turning it will raise or lower the entire sash on the handle side. |
| There is a draft or the window feels loose when locked. | Insufficient compression of the weather seals. | Locate the mushroom-shaped locking cams on the side of the sash. They are eccentric (off-center). Rotating them increases or decreases the pressure they exert on the keeps in the frame, tightening the seal. |
| The sash hits the side of the frame (jamb) when closing. | The sash is not centered in the frame. | Use the lateral (side-to-side) adjustment screws on both the top and bottom hinges to shift the entire sash left or right within the frame. |
| The window is difficult to turn or tilt. | Frame may have been installed slightly out of square, or hinges need lubrication. | First, double-check that the frame is still plumb and level. If so, apply a small amount of white lithium grease or silicone spray to all moving parts of the hinges and locking mechanism. |
Chapter 5: Long-Term Care and Your Investment
Your ALPES windows are built to last. With minimal maintenance, they will perform beautifully for decades.
- Regular Cleaning: Clean the aluminum frames and glass with mild soap and water. Avoid abrasive cleaners. The inward-swinging 'turn' function makes cleaning the exterior glass incredibly simple.
- Hardware Lubrication: Once a year, apply a light lubricant to all moving parts of the hardware—hinges, locking points, and mechanisms. This ensures continued smooth and effortless operation.
- Seal Inspection: Periodically check the weather seals around the sash for any signs of drying or cracking. High-quality seals, like those we use, last for many years, but it's good practice to inspect them.
Conclusion: The ALPES Commitment to Excellence
Installing a tilt and turn window is more than a home improvement task; it's an upgrade to your lifestyle. It brings in more light, better air, enhanced security, and superior energy efficiency. While the process may seem detailed, it is this attention to detail that separates an average result from a truly professional one.
As a company with a 100,000 square meter production base and a global footprint spanning over 50 countries, ALPES understands that our responsibility doesn't end when a window leaves the factory. Our commitment to quality extends to ensuring our customers can realize the full potential of our products. By following this guidance, you are honoring the precision engineering and craftsmanship that goes into every single window we create. You are ensuring that your investment provides comfort, beauty, and peace of mind for many years to come.